Note: this guide is made with the assuption that you are already at an intermediate level of 3d modelling. This guide will not be discussing how to 3d model from scratch.

Making a Vtuber model
Contents
Link to questionnaire
Tutorial
Below is a tutorial showing the steps necessary to creating your own vtuber model. Some sections will include video resources for you to follow.
Introduction
During this section of the documentation, we will be going through the critical steps of how to create a Vtuber model from the preparation of the model to finally exporting the model for runtime. This will include steps such as ARKIT setup and Iphone setup as these steps are vital to creating a more emotional model.


Programs:
IfacialMoCap (Iphone App)
Plugins:
Modeling
Preparing your model
For vtubing, any model can be used as long as it has a rig that can be configured. However, if you want to unlock the true potential and full range of movement and emotion, you have the option to prepare your model accordingly to get the desired effect.
make sure you have your model in an A or T pose. This will make the whole process a lot easier when configuring in unity later on and keeps the model clean and easier to edit.
Once the model is in T pose, save another version of the model called NAME_Rig. This will ensure you have a backup for later.
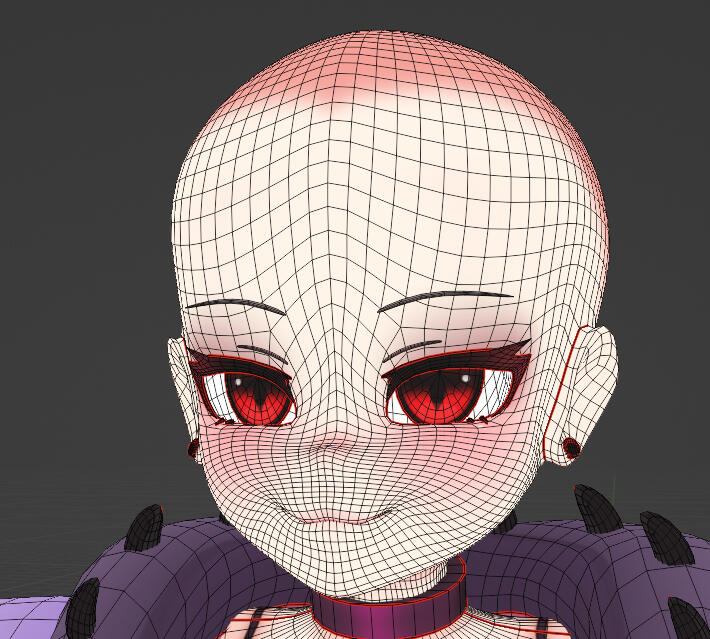
Ensure that your model has the correct topology that is seen in most 3d models, including mouth and eye loops. This will allow for easy facial movement.
Note: during this tutorial, my model should have had more eyeloops as during the shapekey stage, I was fighting with my mesh, more eye loops would have prevented this.
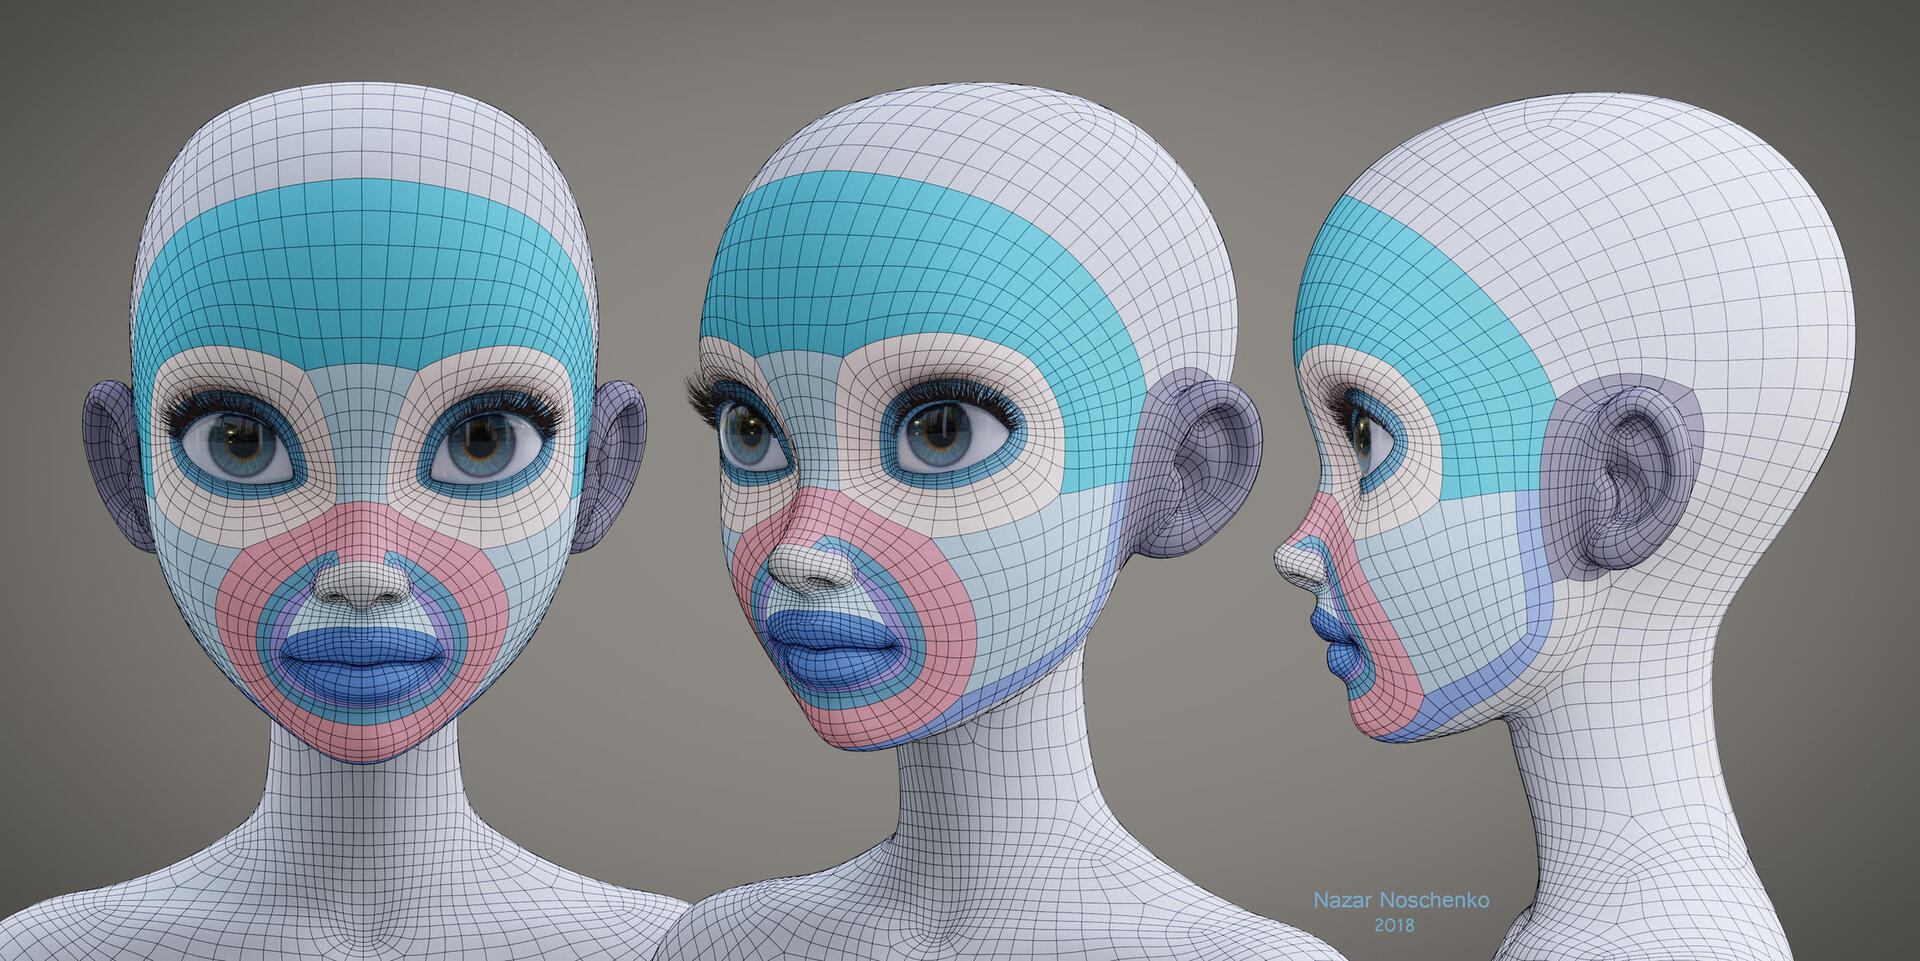
image reference: Nazar Noschenko
Above is an example of ideal face topology. Use this reference when creating your own model.
Anime models differ from typical models as their eye layout is not a sphere, but instead flat plains inside what is known as a "eye sack". Below you can see how this different.
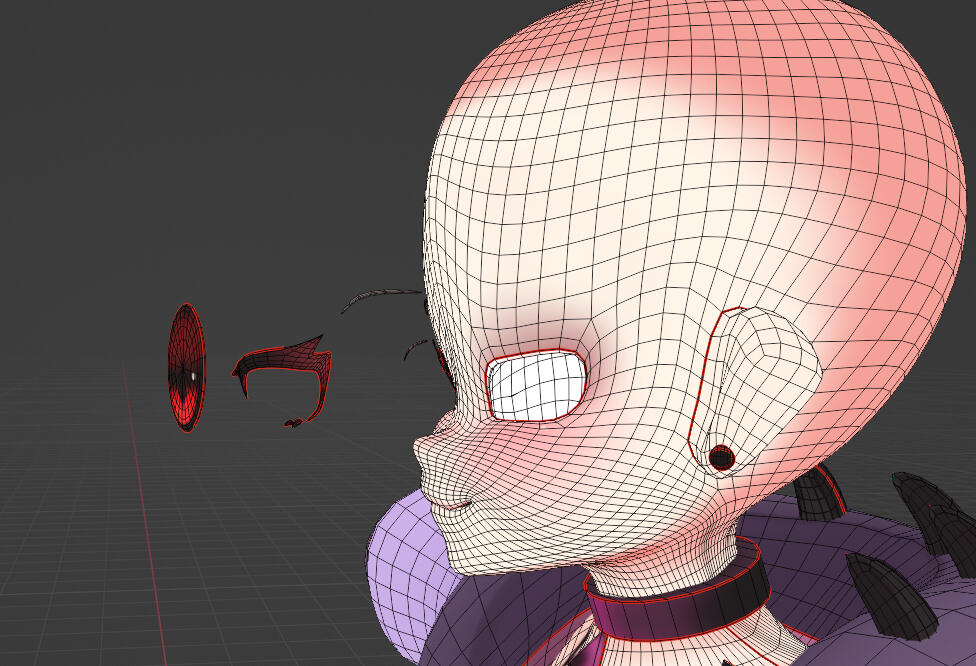
This also can create what is know as the "follow me eye" effect in which the eyes always appear to be looking at the user due to the depth of the eyes planes.
Shapekeys
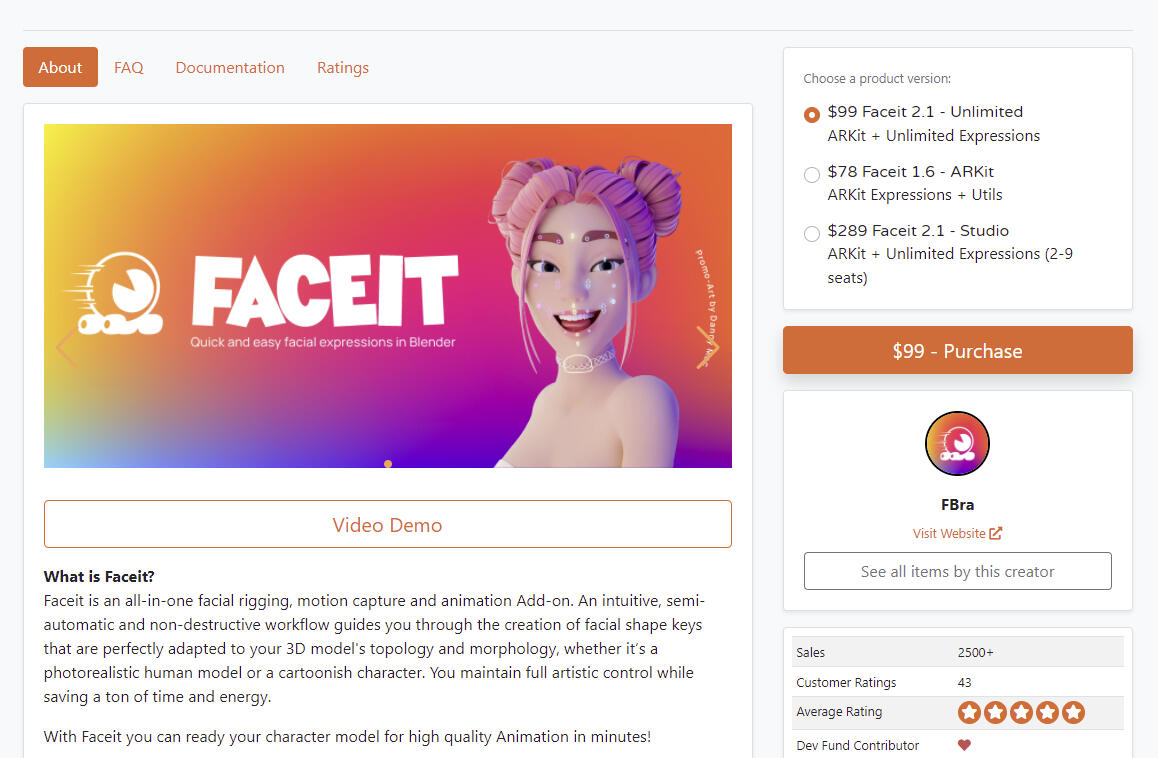
Faceit
This tutorial will be using FaceIt, a plugin for blender that makes it easier to create all the shapekeys needed for Iphone Facial tracking. It is not required however. You can acheive the same effect by creating all 52 shapekeys yourself. Faceit creates a base from you to work from and allows you to edit them to your choosing.
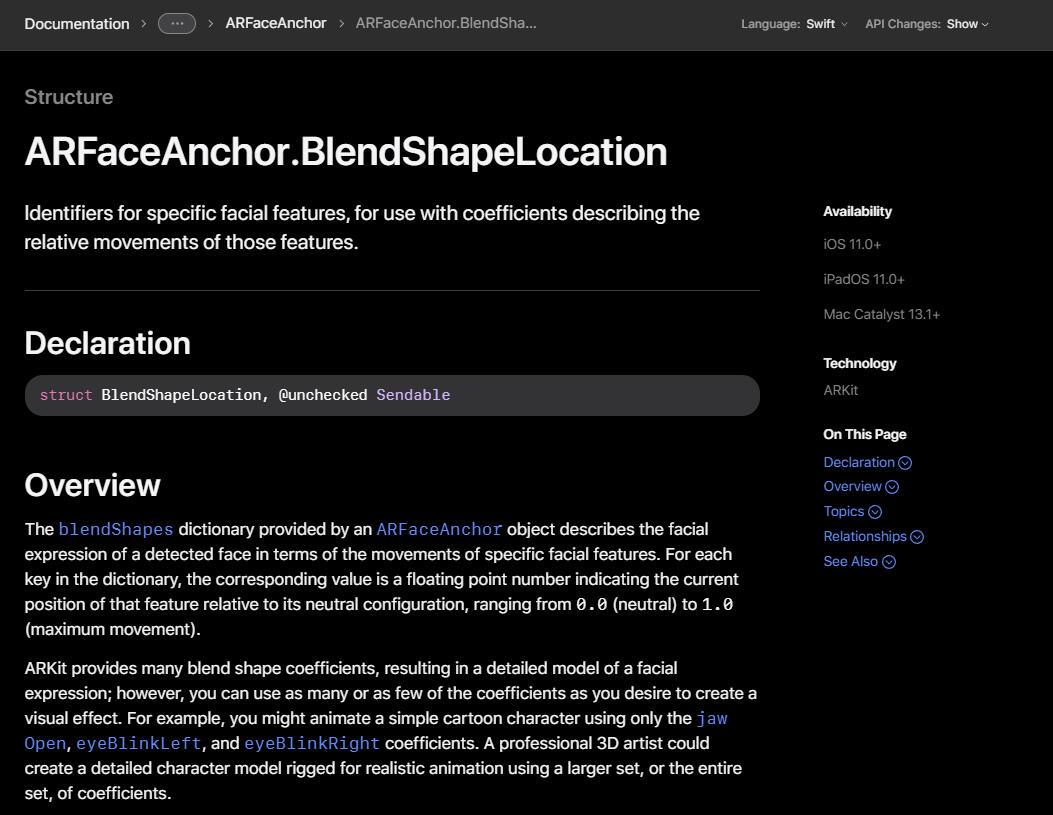
Shapeskey will allow you to create different emotions and facial movements for your model. This works by assigning the pre existing vectors a new location via a slider.you will need to create all 52 ARKIT blend shapes as listed in the link below.List of blendshapesThis official apple link takes you to a list of 52 blendshapes that you will need to set up on your model. These blendshapes and names configure specifically to Iphone face tracking and will allow you to utilize your Iphone to track your facial movements.As noticed, there are a lot of blendshapes you would have to handmake taking hours upon hours of time. You have the choice to either hand make each blendshape or use a paid blender plugin known as FACE IT.
Faceit allows you to map your models face and landmark certain parts of the face to create a custom rig. This plugin also includes the option to generate all 52 blendshapes, edit them and then covert them into shapekeys. This saves hours of time but may require a lot of clean up to make clean. This gives you a nice base to start from.Faceit can turn 4 hours of work into 5 minutes and is extremely recommended. It will create all the blend shapes for you, name them correctly and will give you the tools to adjust the shape keys accordingly.
Bones and Weights
transferring weights
When rigging a vtuber model, things can become tricky. Combining a rig with shape keys can be a hassle unless you’re doing it completely by hand. To get the best possible results, I suggest using the site Mixamo to rig your model. A problem occurs when rigging a model that already has shape keys, Mixamo will delete all shape keys upon import. Luckily, there is a way to get around this issue.

To get around the issue, we will be using Maximo to give us a base skeleton and weights, then transferring that weight data to your original model.
Prepare your model, ready for rigging including modelling and shape keys.
Export the model into Mixamo but keep a backup ready.
Create the skeleton and automatic weights with Mixamo.
Export the model in its original pose (do not default to a t-pose)
Create a backup of your current blender file.
Import the rigged and weighted skeleton into the blender file with your unrigged model.
Use the cats plugin to correct the important skeleton.place the models 1 for 1 on top of eachother.
Parent the original model to the important ameture
click the new model, then the original and head into the weight painting section.
select transfer weights and input the settings as seen in the video.
delete the important mesh.
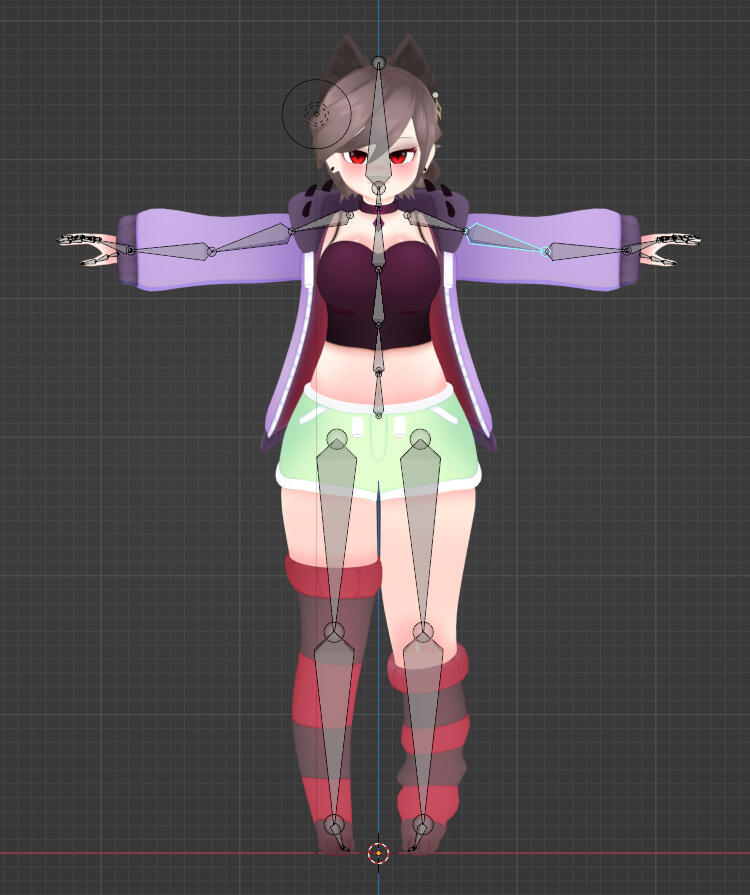
Before added bones
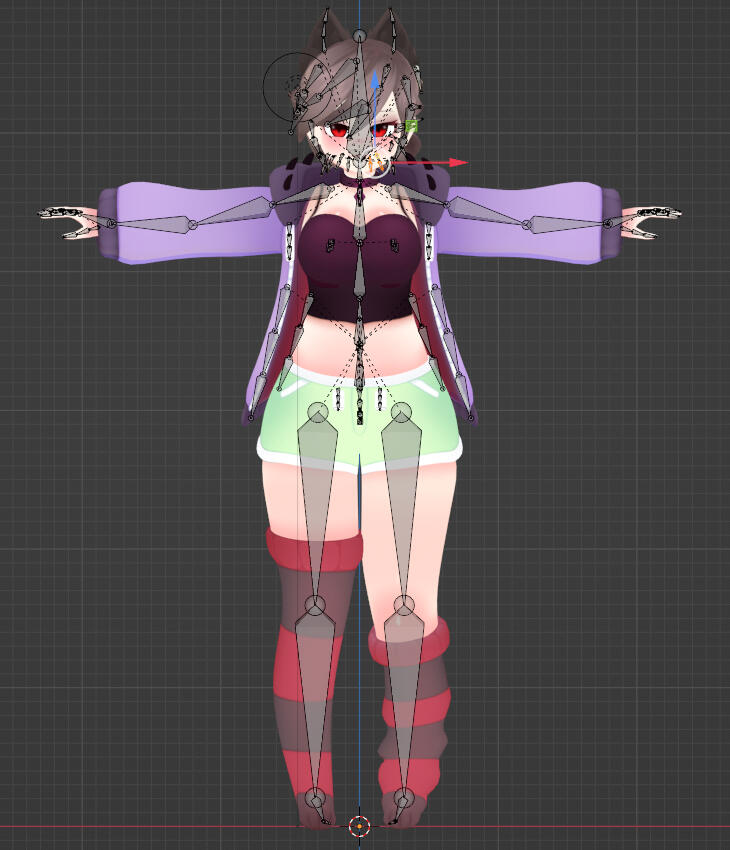
After added bones
Unity
unity importantion and configuration
For this section of the tutorial, you will need unity and the unity package UniVRM. This allows you to import and export vrm models which is the model format you will use for runtime.To install this package, create a unity project and drag the zip file into the content browser at the bottom.
Conversion
First, we will need to convert the model from an fbx to vrm file format. Drag your exported model into the content bar of the unity project. You’ll see that this will import your model, along with your materials and textures. By clicking on the FBX model, information on the right will appear, allowing you to assign textures to the material slots. Assign all your materials before applying.
Once all the materials are applied, head over to the animation tab and configure a humanoid skeleton. This will open a new tab.
Skeleton Configuration
Upon opening the configuration tab, you will not have to adjust much as a lot of the configuration is conveniently done for you. All you will have to do is make sure that the facial bones are assigned correctly. Ensure to remove the jawbone and replace it with “none” as the configurator assigns a random bone to the jawbone. Furthermore, you can click -research- and test out your models rigging with sliders. Once you are happy, click “Done”. Next, export the model using the UniVRM tab and convert the model to a VRM model.
Physics
Once completed, import the VRM model you just created. Place the model into the world and click the “secondary” tab in the content’s menu on the left. From here, a new tab will open on the right, allowing you to assign bones to a built-in premade physics engine. Assign the root bones you wish to have physics and adjust the settings accordingly to your preferences.
Collisions
Adding collisions is very intuitive and allows you to control what parts of your model you wish to interact with bones that have physics. I,E, this can be used to stop hair pieces from travelling through the head. Clicking on bones allows you to assign collision spheres on the right and chance their radius. Add collision spheres on each bone as you require. I’d recommend creating collision spheres on each bone, leaving no room for hair to pass through. Finally, head back to the secondary tab. Under each physics component, you can assign collision spheres. It is suggested to add all your created collisions to the collision groups.
RunTime
setting up your model for runtime
Once your model is export, its ready for runtime! This part can be finicky due to setting up your iphone to connect to VseeFace but please dont be discouraged if it takes a few tries!
Recap of apps you will need:
IfacialMoCap (Iphone App)
I hope everything works for you and you get to enjoy your new model!